LoopMeeting migration to RoomConfig portal
Questi contenuti non sono ancora disponibili nella tua lingua.
Migrate from legacy portal to RoomConfig portal
Section titled “Migrate from legacy portal to RoomConfig portal”This description takes you thru the steps needed to migrate your panels from legacy portal to the new RoomConfig portal.
Please follow the steps carefully and do not skip any of the steps described unless they are marked as optional.
Back
1. Introduction
Section titled “1. Introduction”Since the very first version of LoopMeeting in December 2016 we have had the same central configuration console. Yes, it has for sure been updated throughout the years, but it has been based on the same principles of managing LoopMeeting.
With the new configuration console we are proud to announce that we totally revolutionize the way you manage LoopMeeting panels. Instead of the old way where you use a configuration code and install password, now you only need to enroll the panel with a HASH code and then assign it to whatever room you like.
All communication with the panels is now in real time, so there is no need to wait until the next day for any changes to be deployed.
There is also a bunch of new features that will make the management much easier.
From 1’st of July 2024 the new RoomConfig portal is in official BETA release
There is no rush to migrate, the legacy portal will be running at least until Jan. 2027. (But there will be no further updates to it)
2. Prerequisites
Section titled “2. Prerequisites”Make sure you have followed this step before you start migrating your panels.
Configure RoomConfig configuration console
If you need to reconfigure your calendar integration, you will find the guides here:
LoopMeeting configuration guide
3. Migrate LoopMeeting panels
Section titled “3. Migrate LoopMeeting panels”Here is how you prepare and migrate your panel.
3.1. Update to latest official LoopMeeting app.
Follow this guide to update: /loopmeeting/app-update/
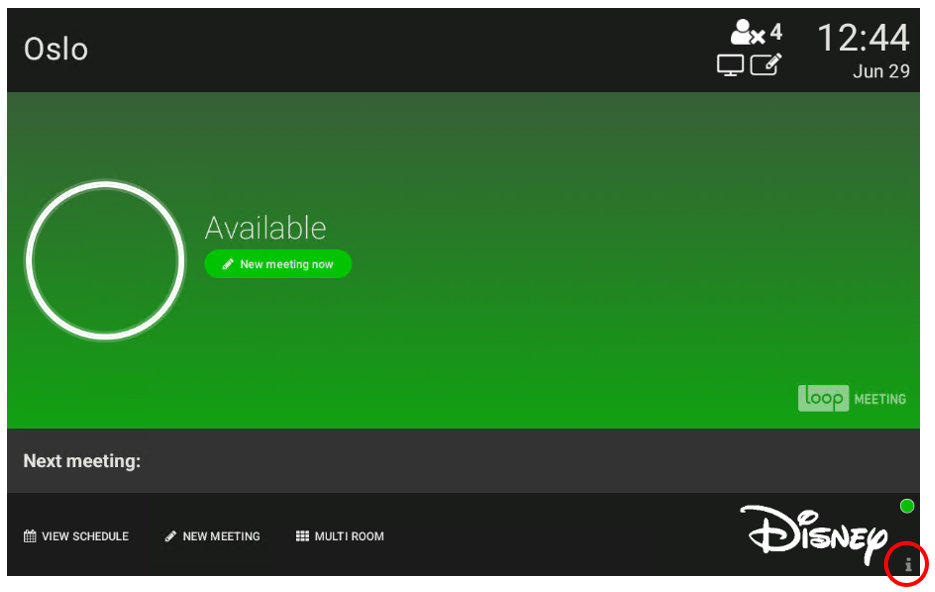
3.2. Reset server settingsOn the panel, press the “I” button in lower right corner. Select “Settings”
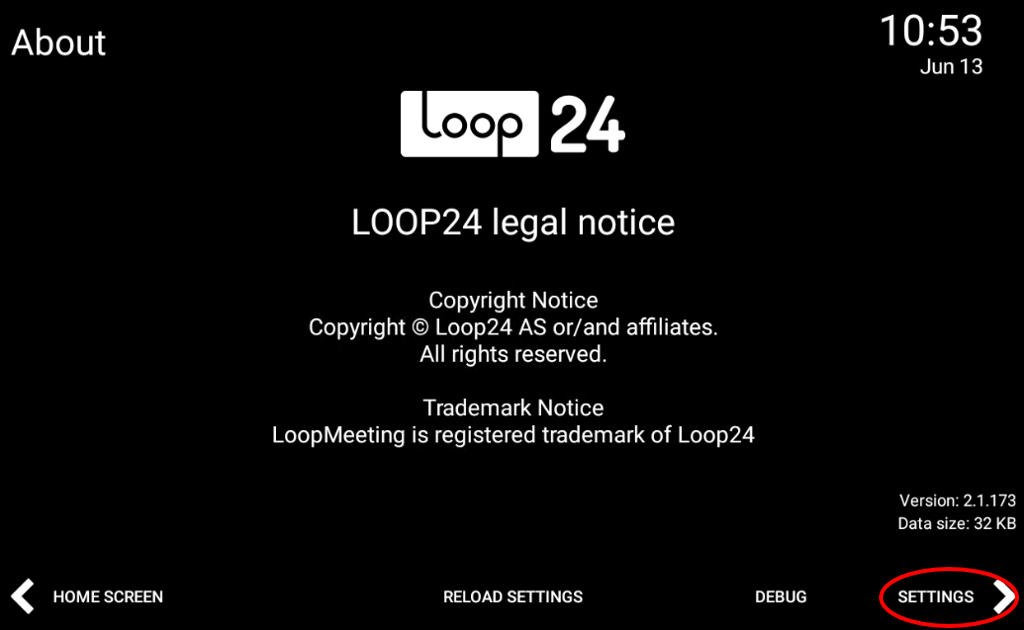
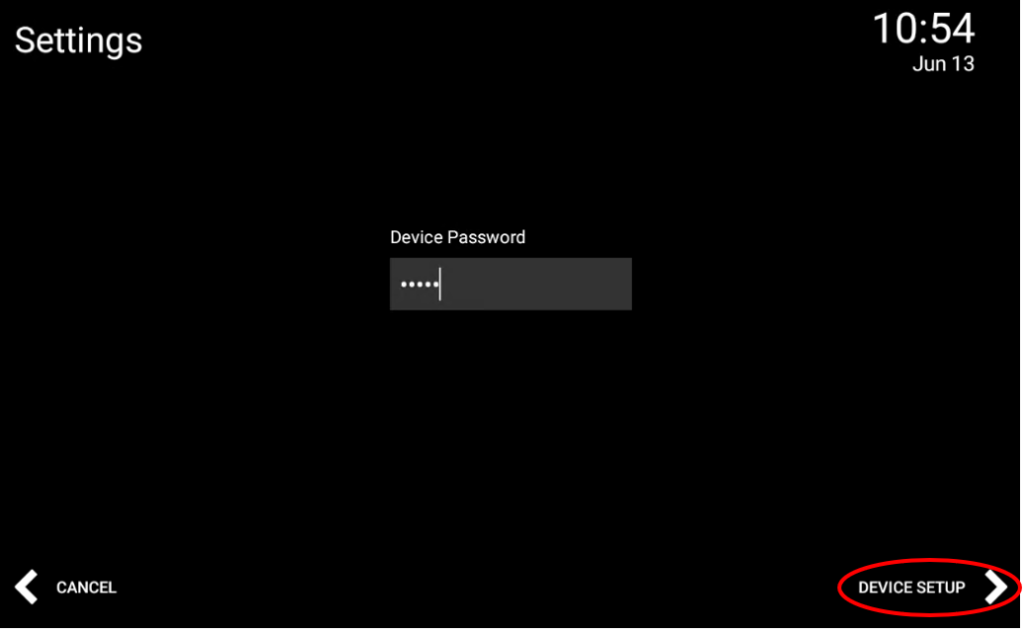
Enter password/PIN and select “Device Setup”
Select “Server Setup”
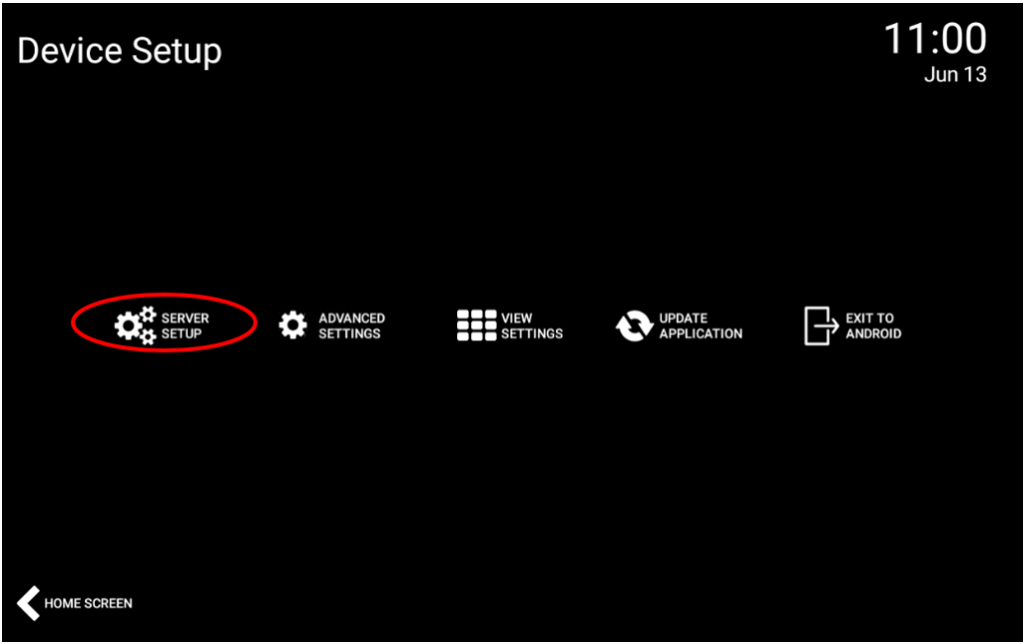
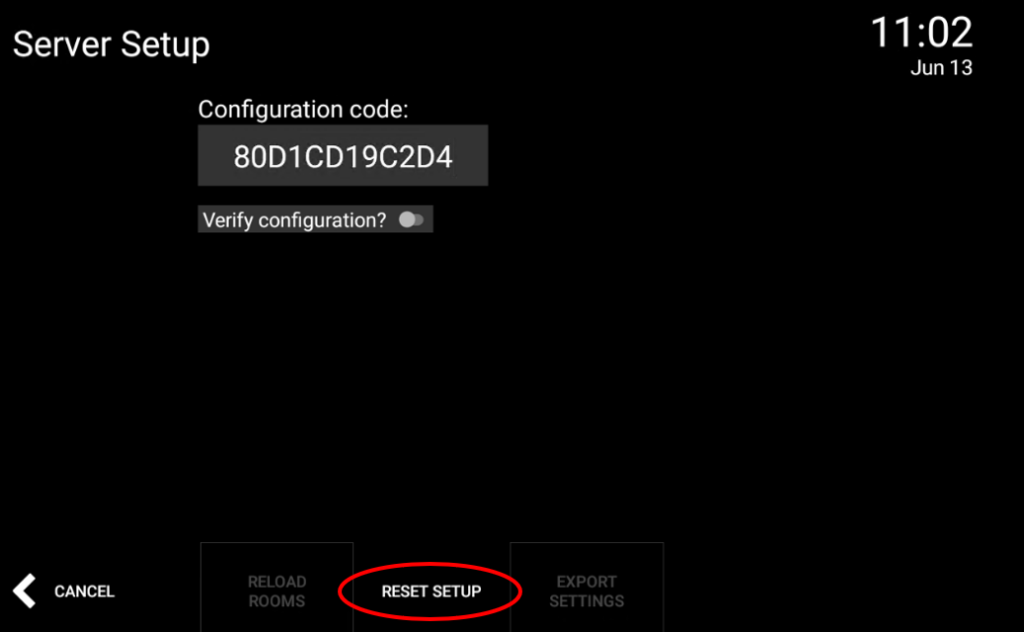
Select “Reset Setup” and confirm OK.
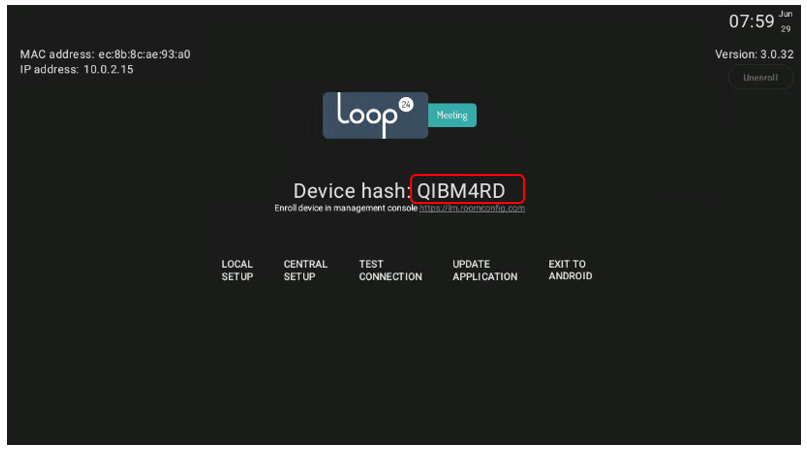
Panel should now show the HASH code.
4. Enroll panels
Section titled “4. Enroll panels”Now you panel is ready to be enrolled into RoomConfig console. Please refer to the RoomConfig console configuration guide.