LoopMeeting Custom Enterprise App for MS365: Create Your Own Integration
Questi contenuti non sono ancora disponibili nella tua lingua.
Create custom Enterprise App
Section titled “Create custom Enterprise App”This description takes you thru the steps needed to create your own custom Enterprise App registration for connetion to MS365 . This will be instead of useing the preconfigured Enterprise App from Loop24.
Please follow the steps carefully and do not skip any of the steps described unless they are marked as optional.
1. Introduction
Section titled “1. Introduction”LoopMeeting comes with a preconfigured Entra-ID Enterprise App for integration with your MS365 environment. In most cases this is the easiest and most convenient way to set up the necessary integrations. However, for the more advanced organizations LoopMeeting has an option to create and use your own custom Enterprise App registration. This will give you total control of the MSgraph integration and will be an even more secure way for connecting the LoopMeeting panels.
2. Prerequisites
Section titled “2. Prerequisites”The LoopMeeting application needs a service account that has full rights to the resource calendars (Meeting room calendars) where you want to connect LoopMeeting panels.
Note: Make sure that your meeting rooms resource mailboxes are configured correctly.
3. Create custom Entra-ID Enterprise App registration
Section titled “3. Create custom Entra-ID Enterprise App registration”Log into your Entra-ID console with global admin account : https://entra.microsoft.com/
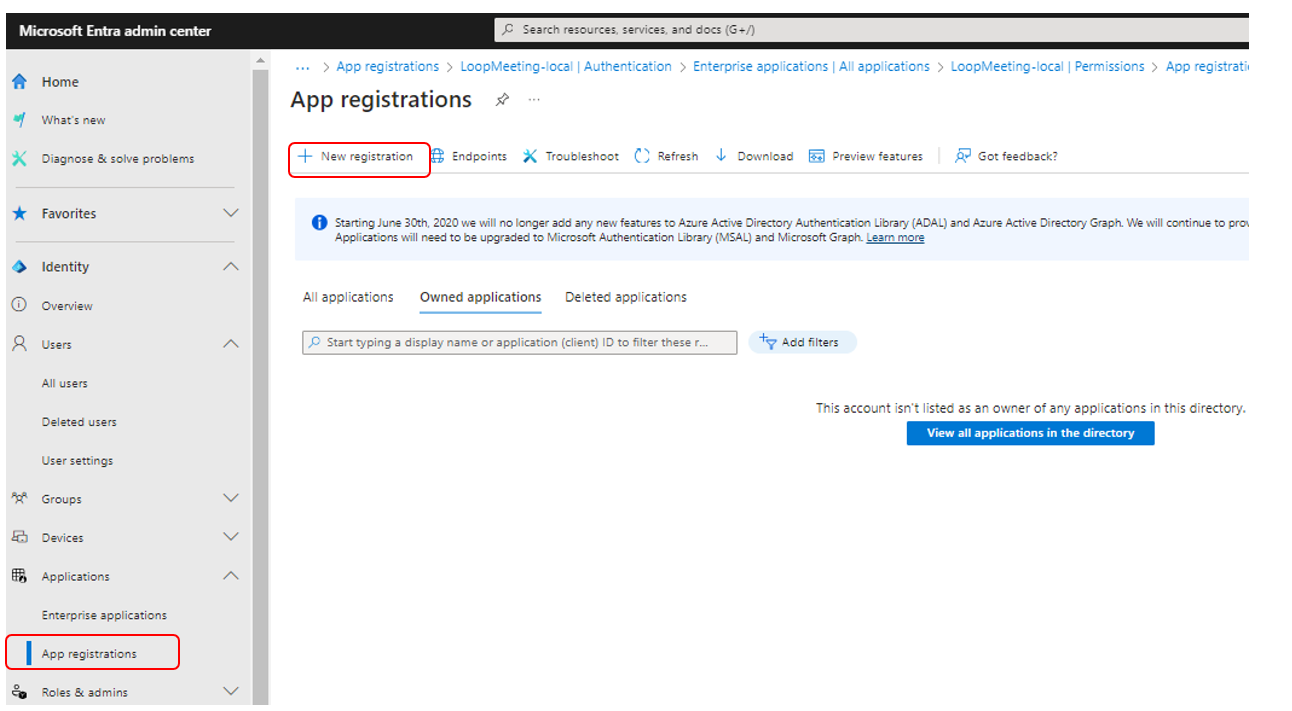
Select “App registrations” in the left side menu, and then “New registration” in the top menu.
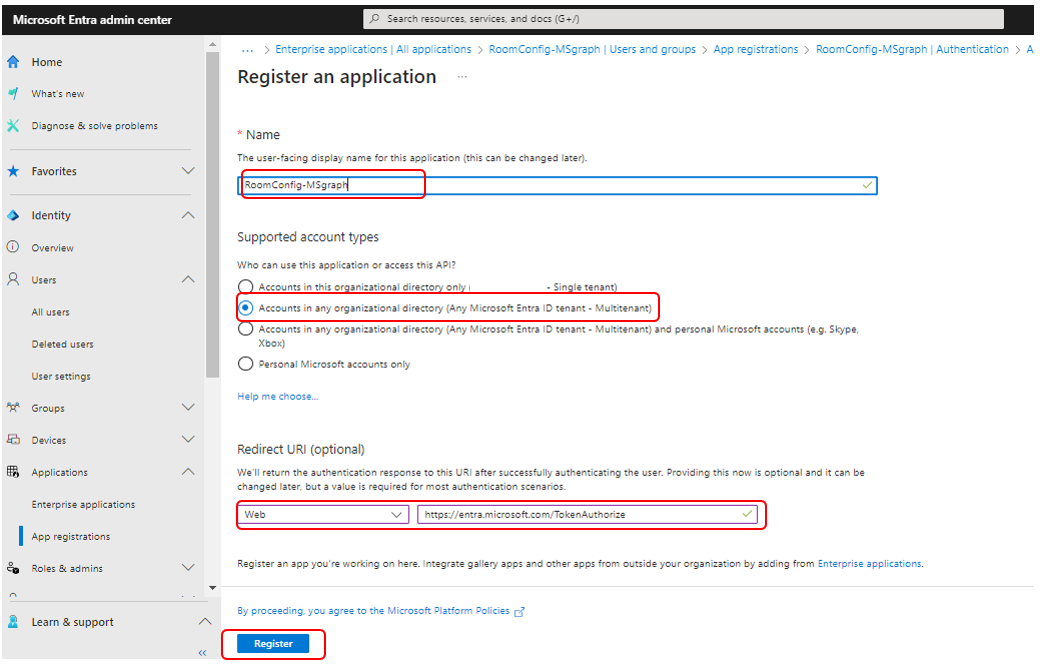
Give the application a name
Select “Accounts in any organizational directory”
Enter Redirect URIs
https://entra.microsoft.com/TokenAuthorize
Click register
Select your application
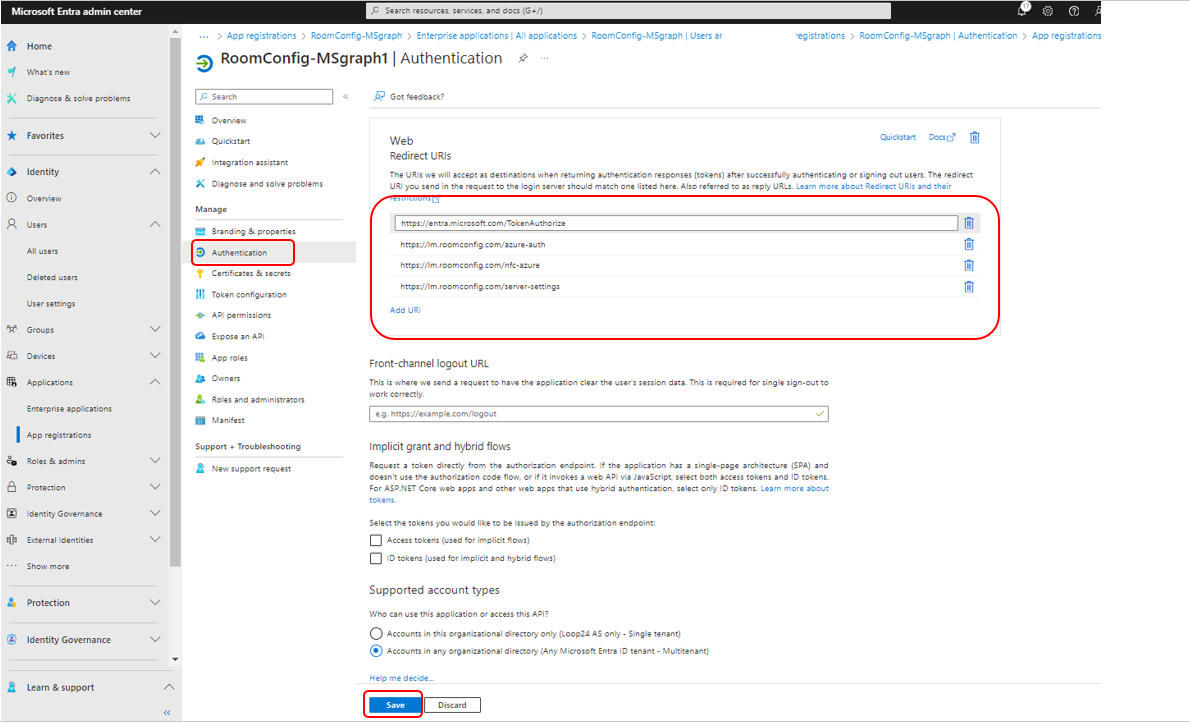
Select Authentication in left side menu
Add the following Redirect URIs
https://lm.roomconfig.com/azure-auth
https://lm.roomconfig.com/nfc-azure
https://lm.roomconfig.com/server-settings
Click “Save”
Select “API permissions” on the left side menu
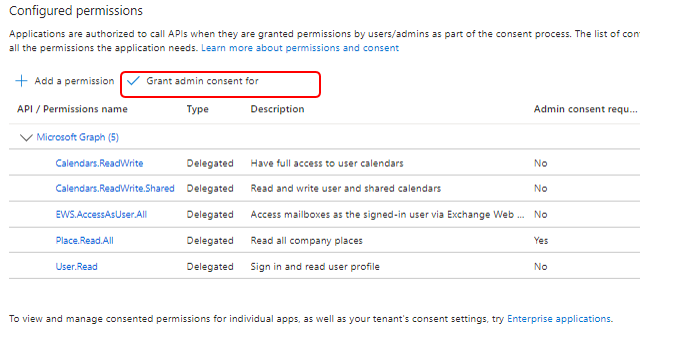
Click “Add permission”
Add the following Microsoft Delegated Graph permissions:
– Calendars.ReadWrite
– Calendars.ReadWrite.Shared
– Pleace.Read.All
– Optionally if you are going to use NFC booking option, add EWS.AccessASUser.All
Select “Grant Consent” for “your organization”
Select “Certificates and Secrets” on the left side menu
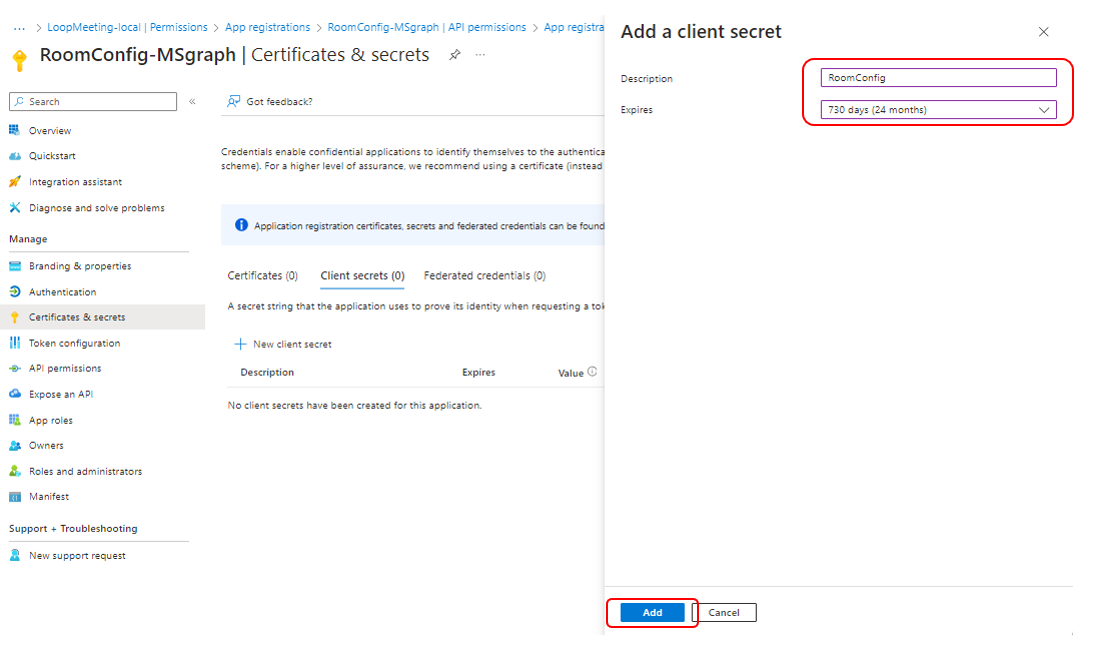
Click “New client secret”
Give the secret a name and set the expire date.
We recomend to set to the max – 24 months.
Please remember that every 24’th month you need to create a new secret for the application.
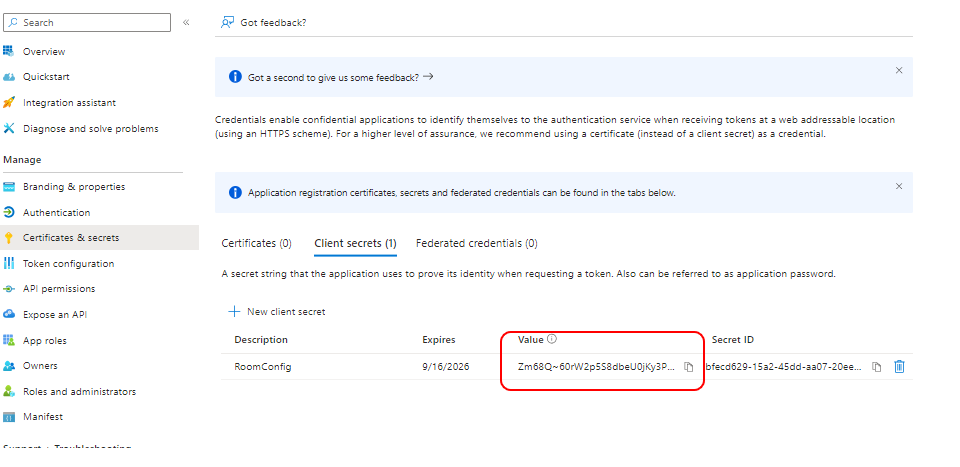
IMPORTANT!
Make a copy/note of the secret value, you will not be able to see this value again.
This value will be used on a later stage when configure Roomconfig console.
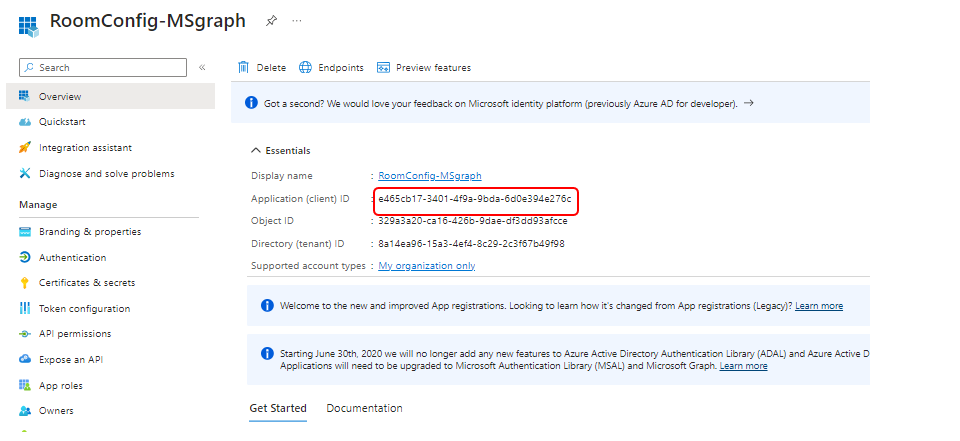
Go to overview and make a copy/note of the Application ID value.
This value will also be used on a later stage when configure Roomconfig console.
Log in to your RoomConfig console
https://lm.roomconfig.com
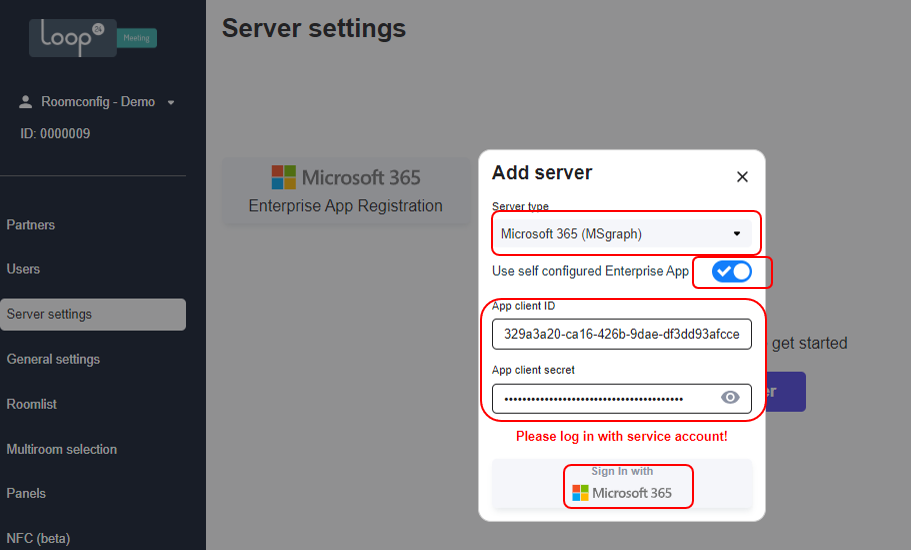
Select “Server Settings” and “Add Server”
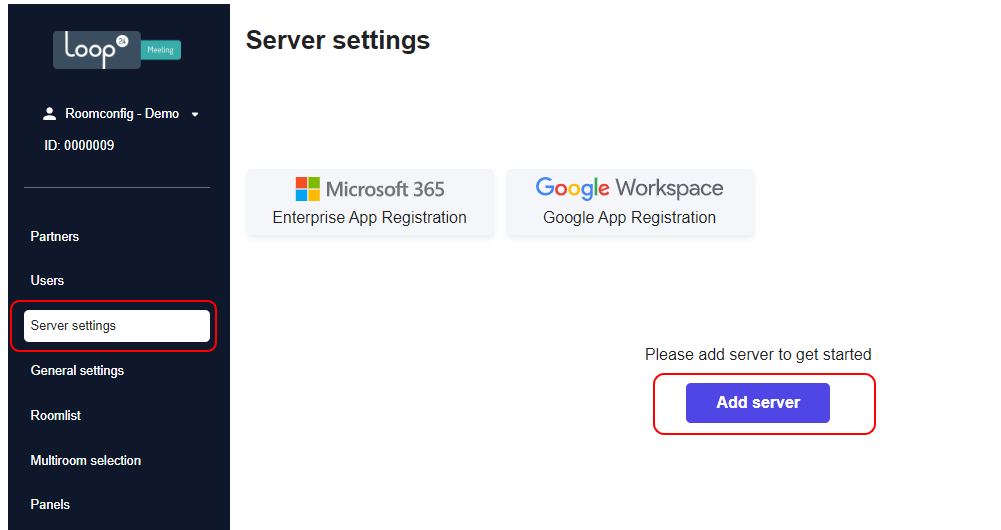
Select server type “Microsoft 365 (MSgraph)”
Select “Use self configured Enterprise App”
Paste the App Client ID and Secret that was created and noted earlier
Log in with you service account.
(Do not log in with Teant admin or your own account)
Now your server is added and you can proceed to “Roomlist” and “Add roomlist”
Please refer to our RoomConfig guide.
/loopmeeting/central-configuration-roomconfig-portal/