Central Admin configuration
Deze inhoud is nog niet vertaald.
Configure Central Admin Console
Section titled “Configure Central Admin Console”This description takes you thru the steps needed to configure central admin Please follow the steps carefully
Back
1. Register account
Section titled “1. Register account”To register an account in Central Admin, go to URL https://loopmeeting.no/registration.php
Please make sure you have followed the steps described in support section to make your calendar service ready.
Microsoft 365, Exchange and Google Suite environments all need preparation so please follow the steps described in Support carefully.
Please note that after your panels are connected to Central Admin, any changes made will be loaded to the panels within 24 hours (In the time period configured as outside working hours)
2. Server type descriptions
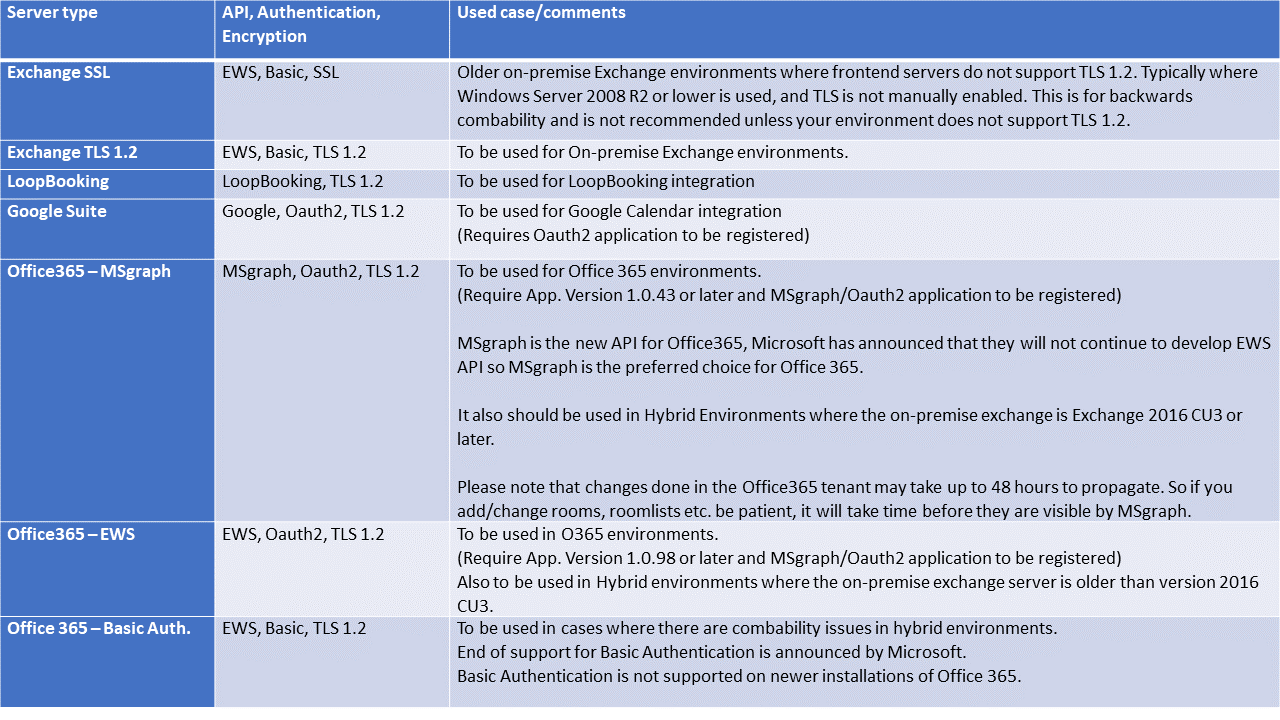
Section titled “2. Server type descriptions”When connecting Central Admin to your calendar system you need to choose what kind of calendar system you have. Please read the description below carefully to choose your environment correctly.
Please note that in some O365 environments it will work better to use server type “O365 – EWS” than O365 – MSgraph”. This is especially in cases where you have hybrid Exchange installation or local AD that syncs to O365.
3. Configure Central Admin
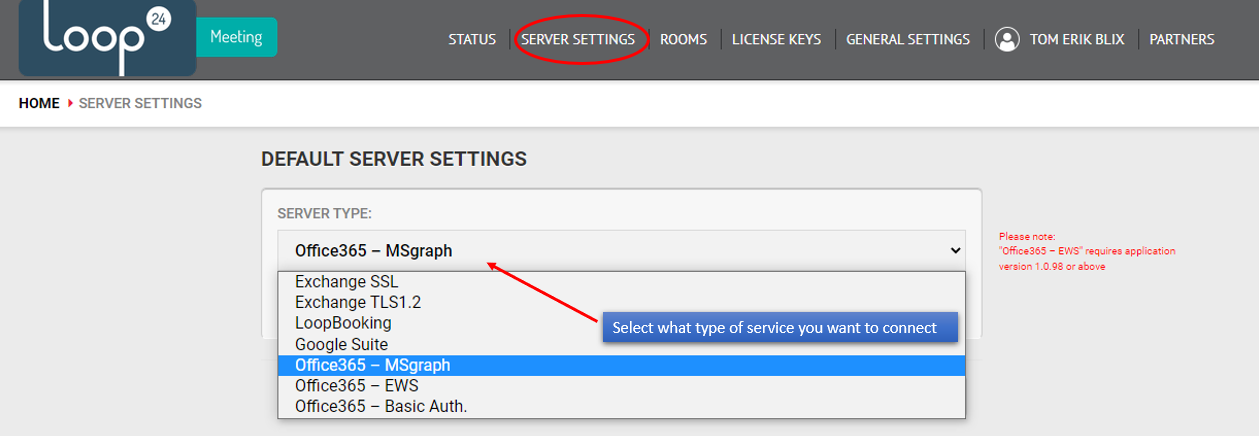
Section titled “3. Configure Central Admin”To start the configuration log in to https://loopmeeting.no/admin
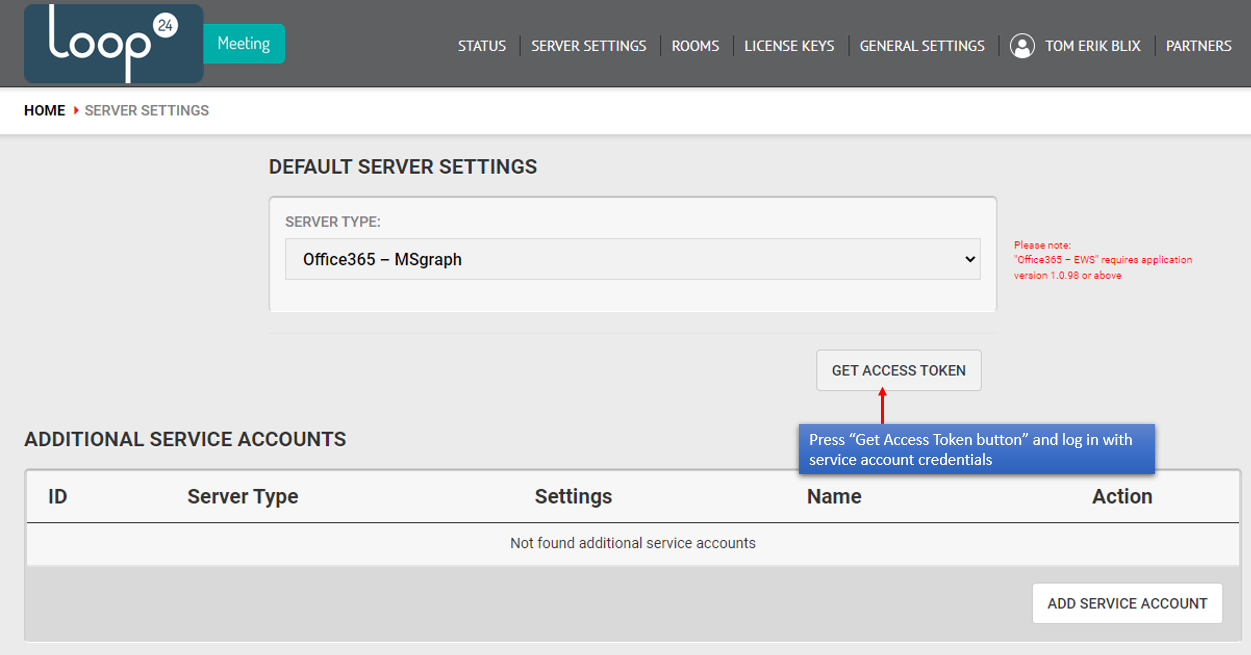
The first thing you need to do is to configure your server type. Please note that Office365 – EWS requires LoopMeeting app version 1.0.98 or above, if you need to update the panels please follow the update guide.
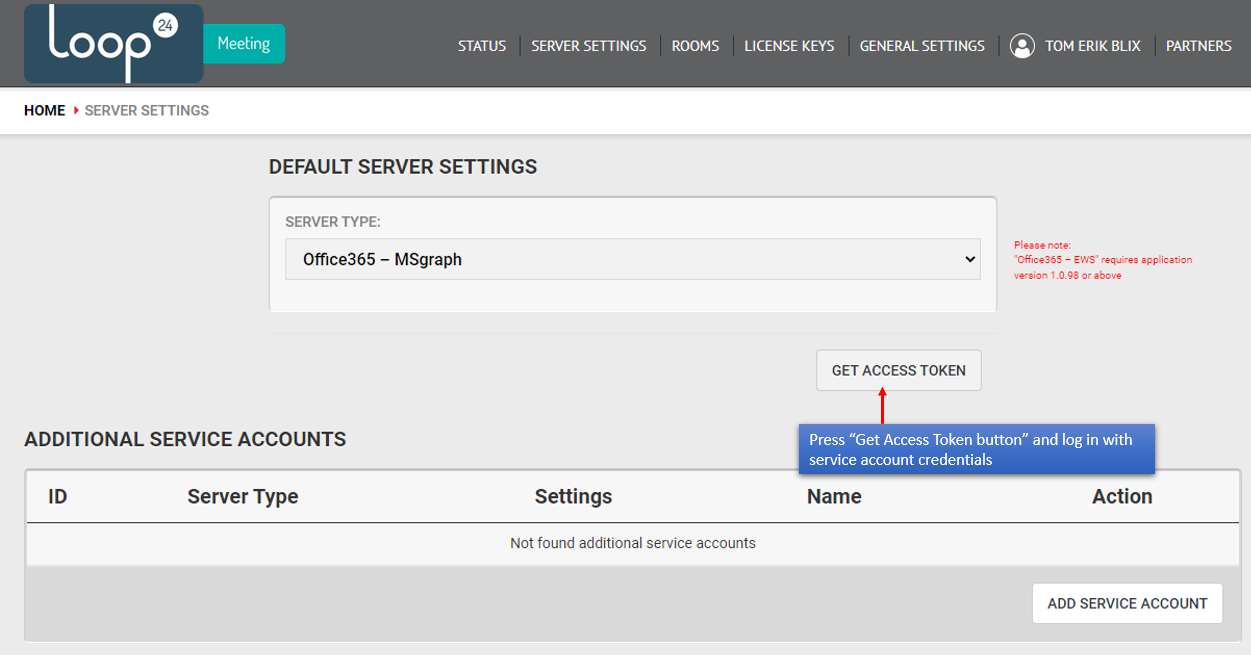
IMPORTANT: The first time you use this tool you need to log in with the Global Admin account, to register the LoopMeeting Azure Enterprise Application and grant the rights it needs. Please refer to this guide./loopmeeting/authenticate-oauth2-and-msgraph/
4. Configure General settings
Section titled “4. Configure General settings”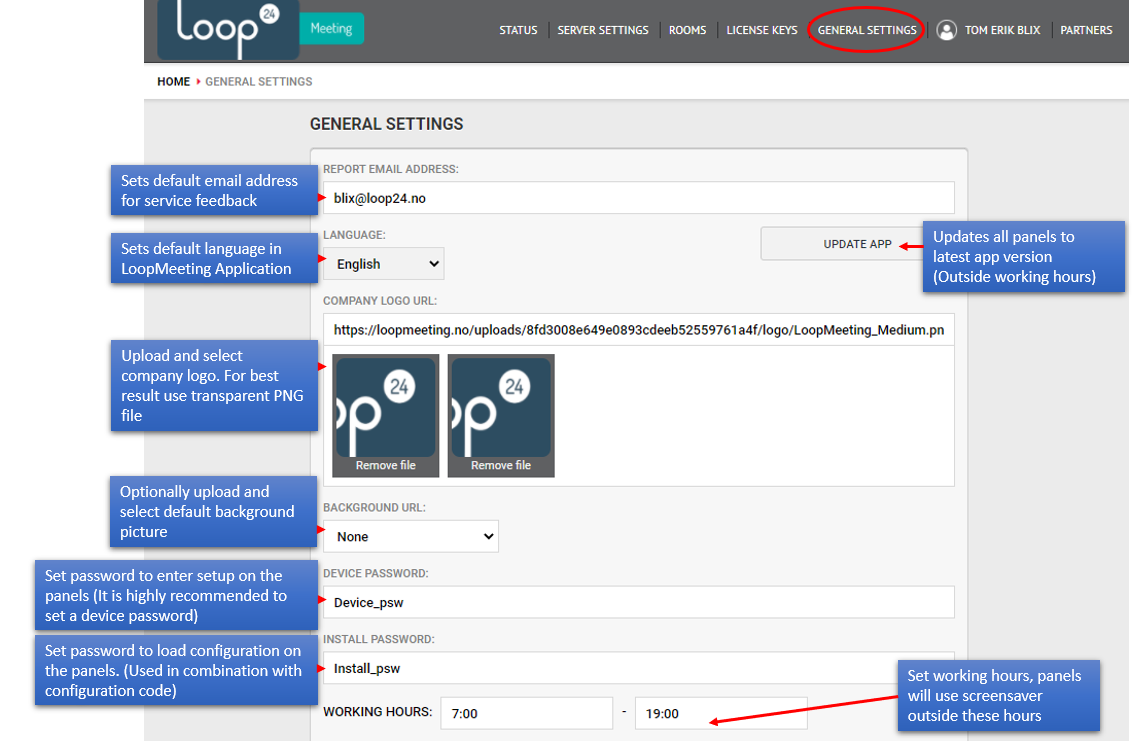
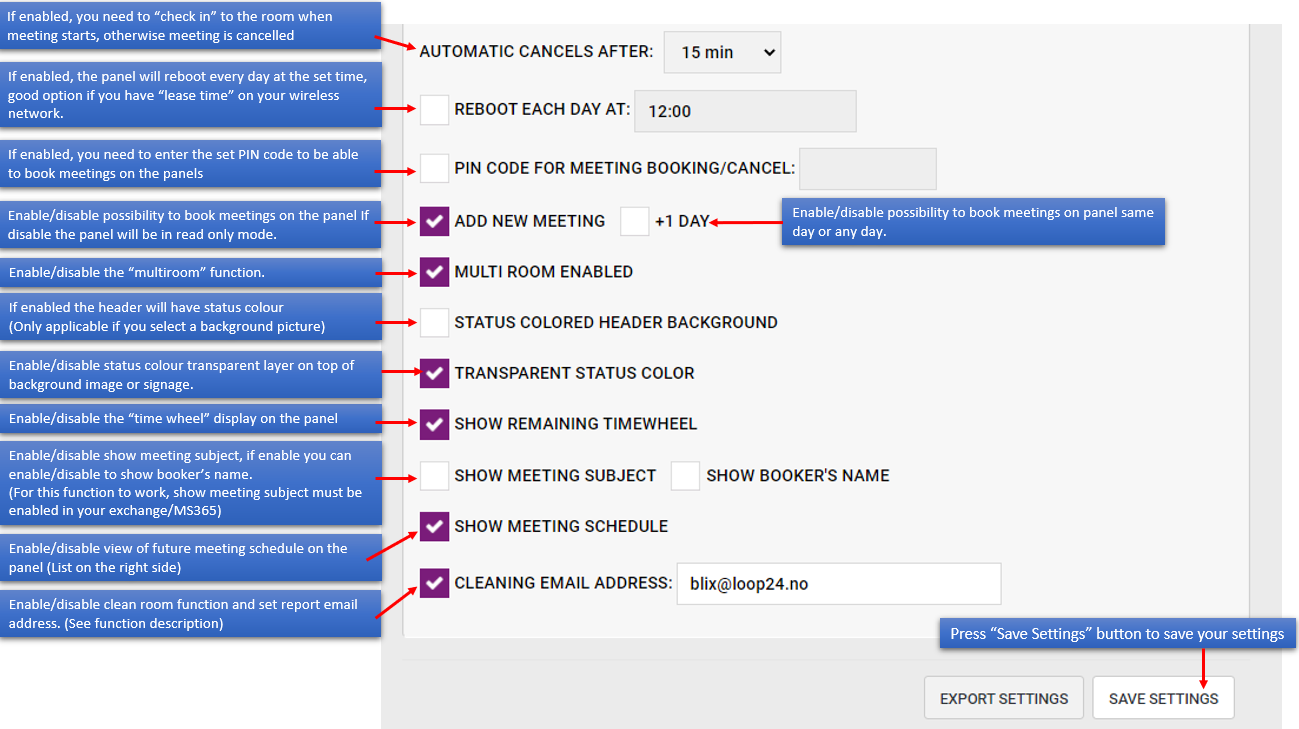
For more information about the “Clean Room” feature see this function description
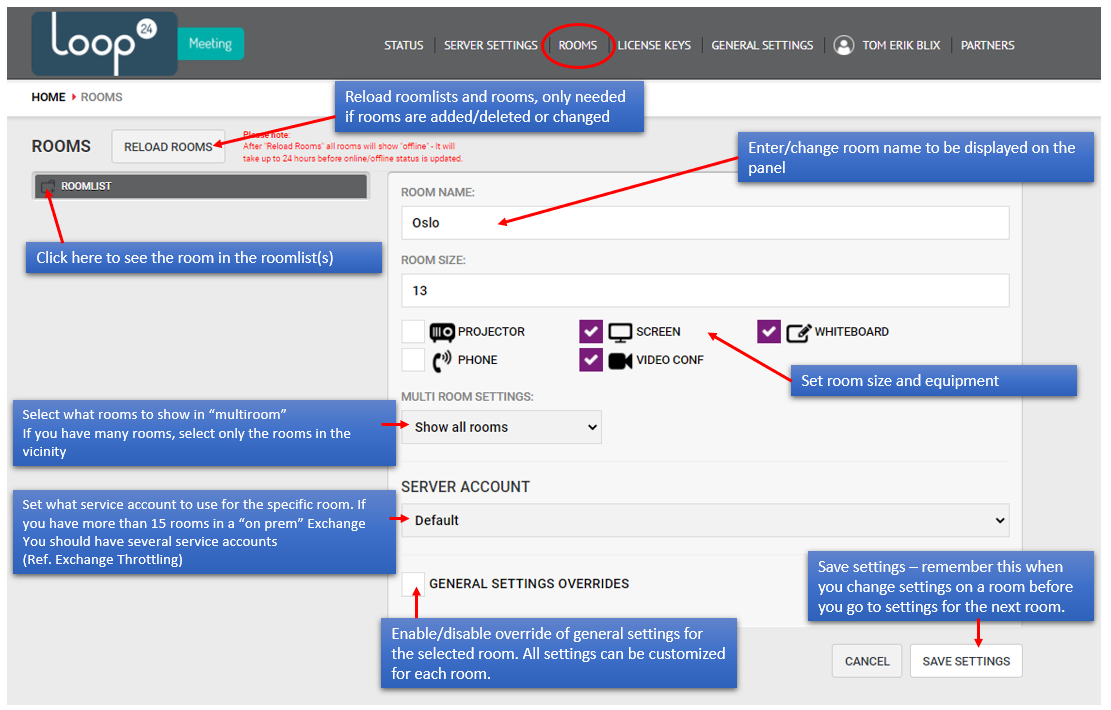
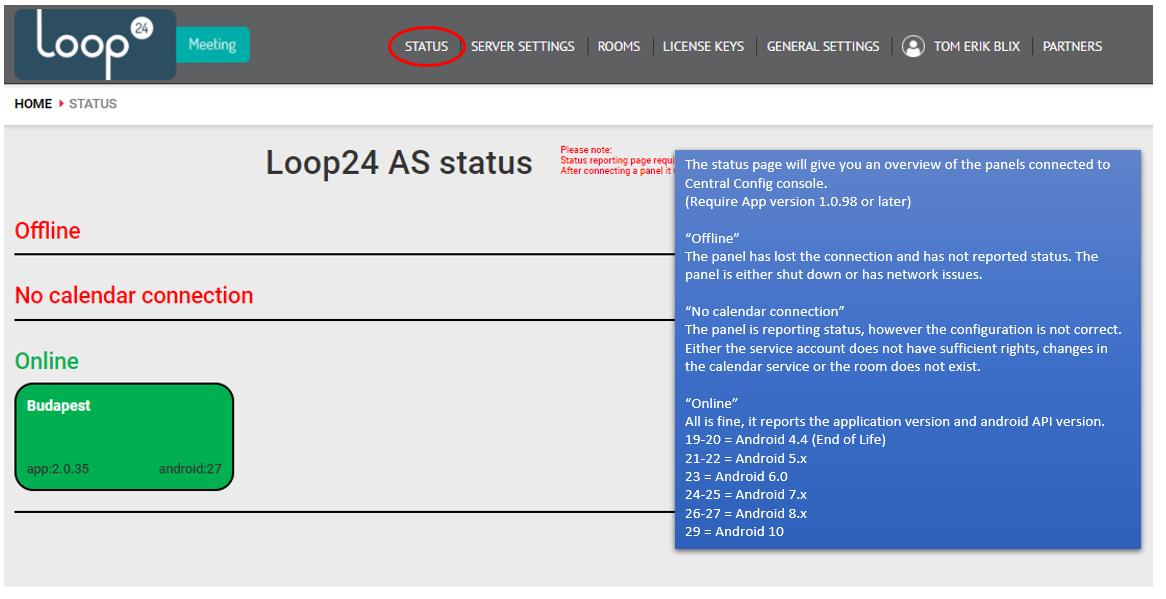
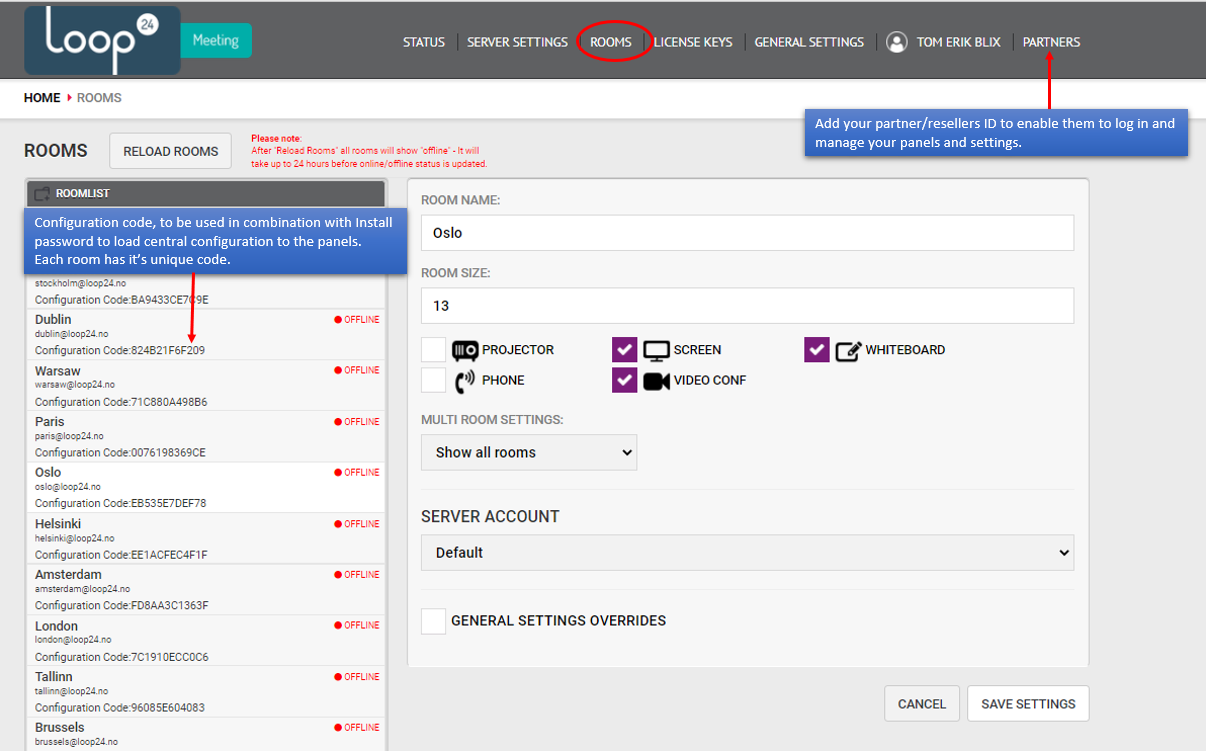
5. Load settings to the LoopMeeting panels
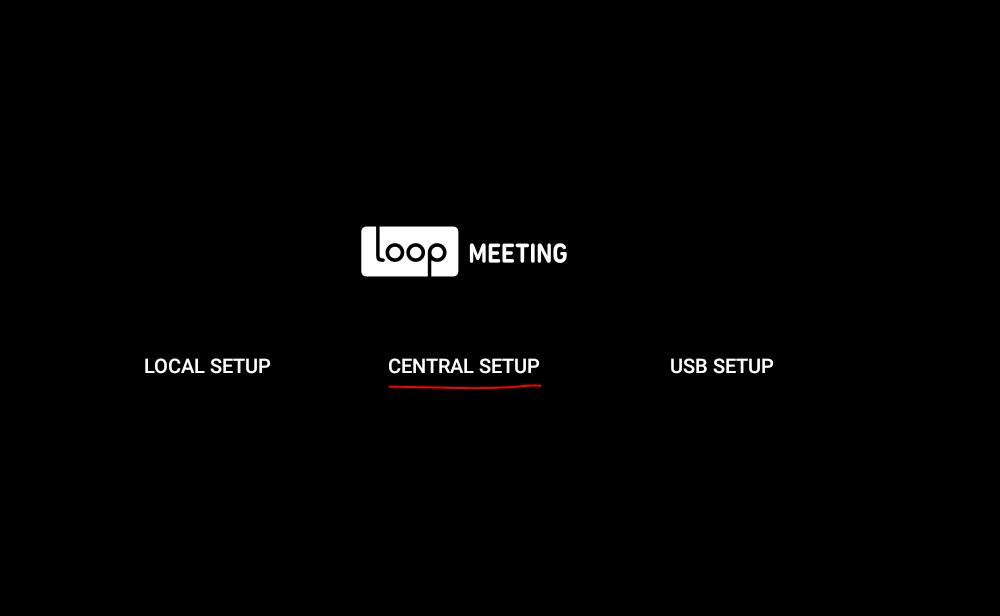
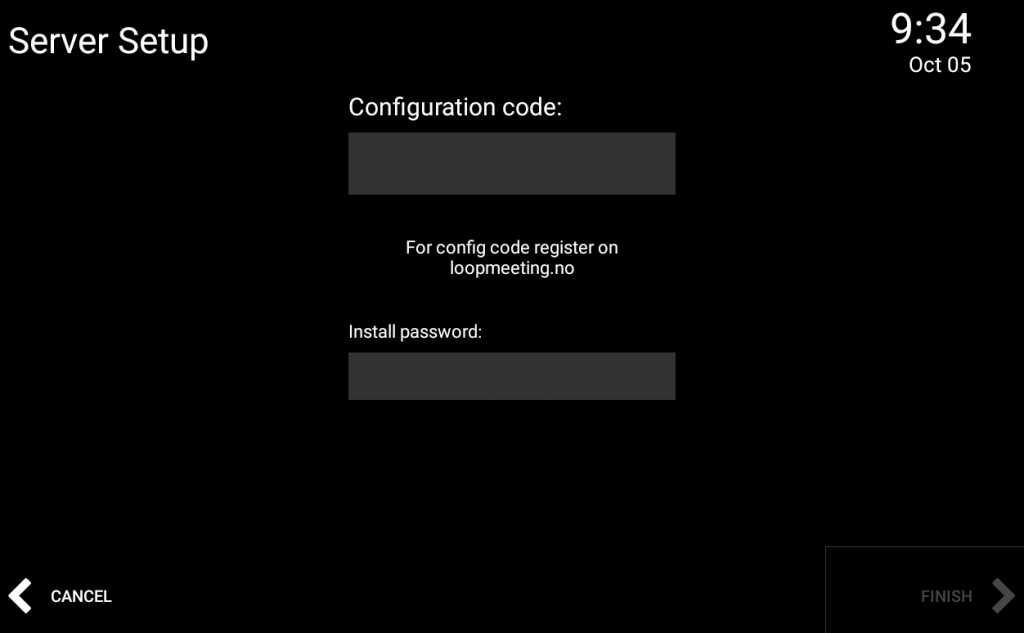
Section titled “5. Load settings to the LoopMeeting panels”Now you are ready to set up your panels. On the panels, select “Central Setup” on the panel and enter the unique configuration code and install password. Then press “Finish” button to connect the panel to the correct room.