Calendar Widget - Google
Deze inhoud is nog niet vertaald.
Configure Google Suite for use with LoopSign
Section titled “Configure Google Suite for use with LoopSign”This description takes you thru the steps needed to get your Googe Suite ready for LoopSign.
Please follow the steps carefully and do not skip any of the steps described unless they are marked as optional.
1. Introduction
Section titled “1. Introduction”LoopSign can connect to Google Suite calendar and show status on the rooms you select. To be able to use this feature you need to create a service account and set permission in your Google Admin console.
1. Introduction
Section titled “1. Introduction”LoopSign can connect to Google Suite calendar and show status on the rooms you select. To be able to use this feature you need to create a service account and set permission in your Google Admin console.
2. Prerequisites
Section titled “2. Prerequisites”The loopMeeting application needs a Room Admin account that has rights to manage the
resource (Meeting room calendar), as well as Oauth App trust.
Please follow this guide to make sure your Google environment is configured correctly
2. Prerequisites
Section titled “2. Prerequisites”The loopMeeting application needs a Room Admin account that has rights to manage the
resource (Meeting room calendar), as well as Oauth App trust.
Please follow this guide to make sure your Google environment is configured correctly
3. Create Service Account
Section titled “3. Create Service Account”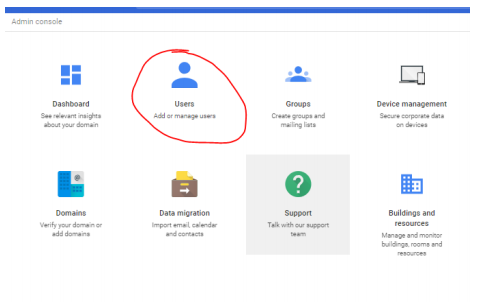
Sign in to the Google Admin Console
https://admin.google.com
– Select Users
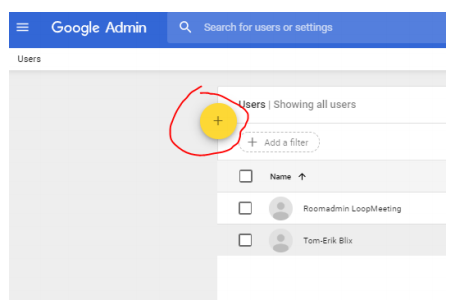
Click “+” button to add new user
Create a user that will be used as the LoopSign Service Account.
Make a note of username and password
This needs to be used with the LoopSign calendar widget.
4. Share room calendars / Give Service Account rights
Section titled “4. Share room calendars / Give Service Account rights”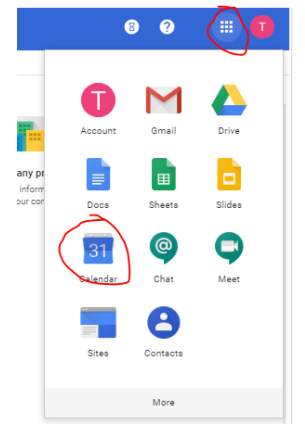
Select Calendar from the Google Apps
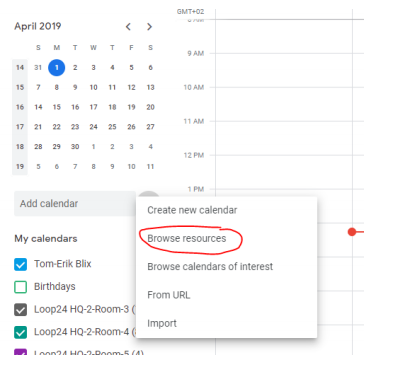
Click on the three “dots” in the end of “Add calendar” and select “Browse rescources”
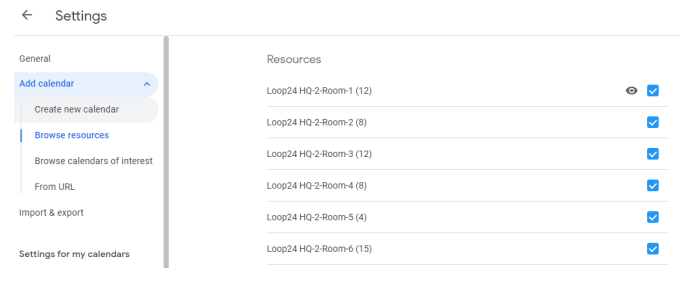
Tick off to view all your room calendars
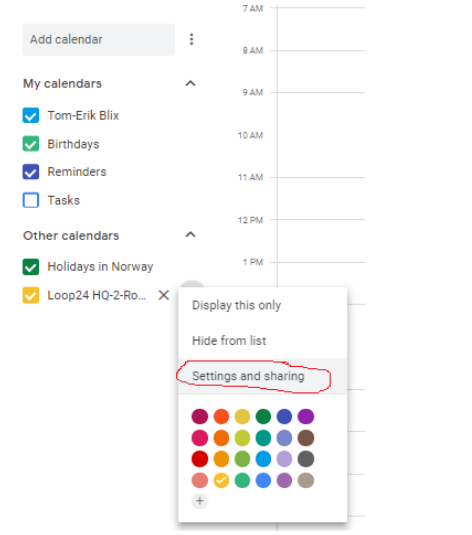
Click on the three “dots” in the end of the calendar you want to configure and select “settings
and sharing”
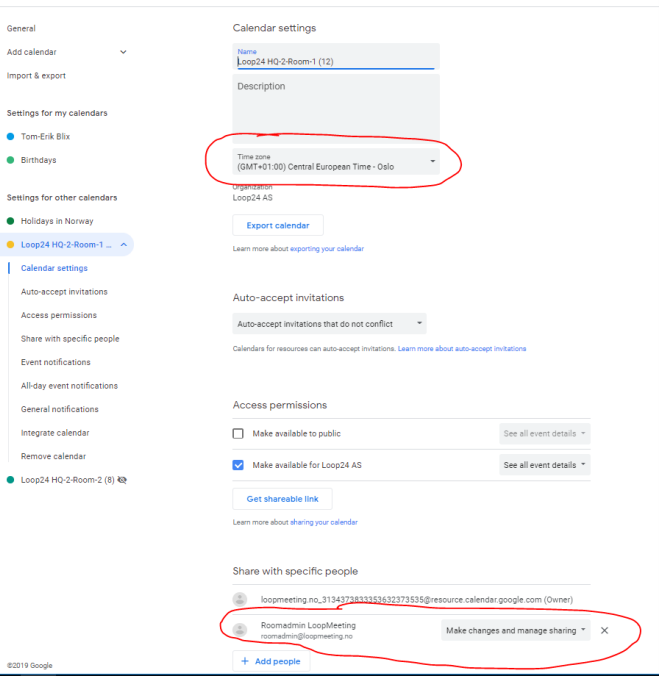
Make sure to set the correct time zone
Add your service account user that you created in step 3 with rights to “See all event details”